The Rooster Teeth Community Needs Your Help
Welcome to the first collaboration between the Rooster Teeth and Forgehub communities.
The Winter Grifball Season sees the addition of Custom Team Home Courts. Teams can now create their own Home Court which will be allowed for all Home Games during Official League play, Playoffs, Tournaments or Bum Rushes (with the exception of Bum Rushes using special maps). Don't Panic, you do not have to build any walls or place spawn points, you simply download a special template map and decorate it according to the instructions provided below. UPDATE: These maps have been approved for use in the Summer League, but you will have to update the name and description and submit it for re-certification.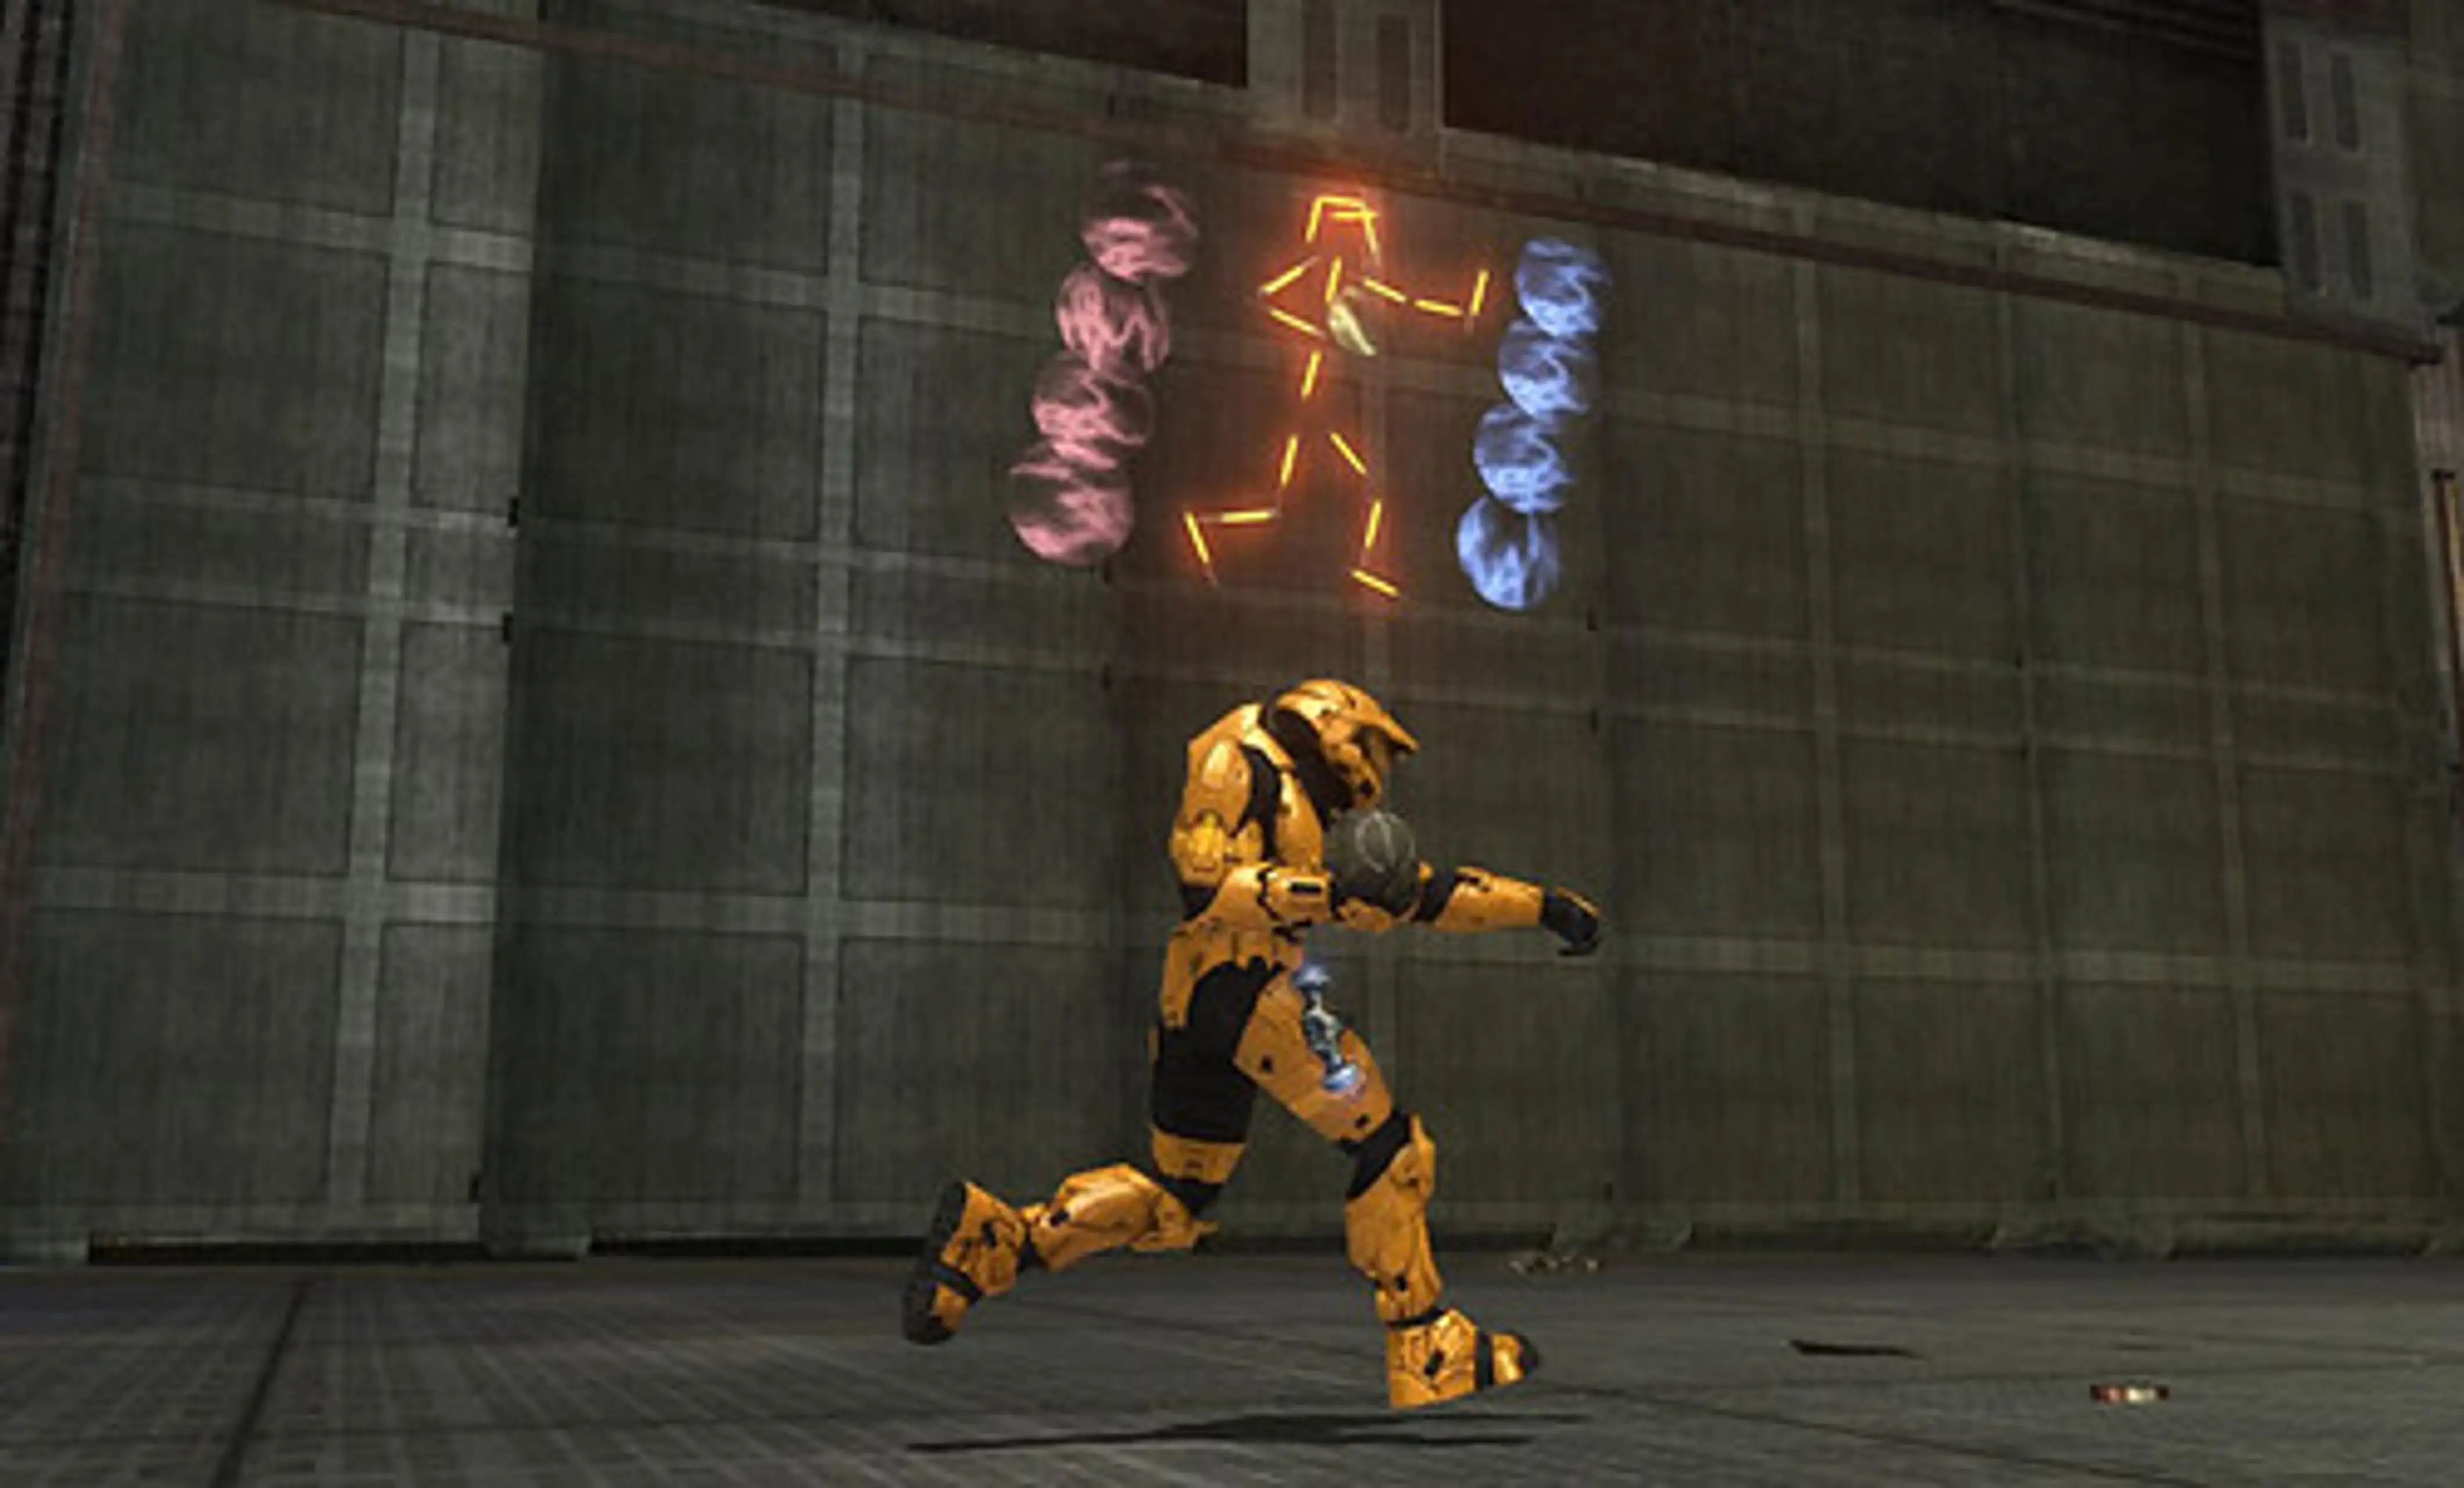
This thread will serve three purposes. First it contains the complete instructions for decorating the map. Second, the rules to follow. Third, it will serve as a place where Forgehub designers will offer their services to help teams, who do not have forging experience, build their maps. Discussion for all three elements will be allowed. There is a thread at the Grifball forums pointing to this thread so you will see many new members posting here.
Please Note: We do not care that you do not like Grifball. This is not about Grifball, this is about helping another community with their forging needs. Please sign up below and a team may contact you if they require your help.
The Classifieds:
Forgehub Designers who want to help build custom Home Courts for Grifball teams please use the following format in your post:
Forgehub Designer For Hire
Real Name - (optional)
XBL Gamertag -
Maps I have built - (up to 3 links)
Contact me by - (PM, email, XBL, MSN etc.)
Grifball Teams who want to hire Forgehub Designers to build custom their Custom Home Courts please use the following format in your post:
Forgehub Designer Wanted
Team Name -
Grifball Team Link -
Grifball.com Forum Name -
Real Name - (first name, optional)
XBL Gamertag -
Bungie.net Service Record Link -
Contact me by - (PM, email, XBL, MSN etc.)
The Rules:
For the purposes of this discussion i will use the following terms (these may be different than the standard terms):
Select - Highlighting an item and pressing X
Grab - Highlighting an item and pressing A
Place - selecting an item from the item menu and placing it on the map
Turn On - Highlighting an item, Place at Start=Yes, Restart Round
Turn Off - Highlighting an item, Place at Start=No, pressing X twice, Runtime Minimum=0, Restart Round
Force On - Highlighting an item, pressing X twice, Runtime Minimum=Runtime Maximum
Delete - Highlighting an item, pressing Y
Save, or Lock - while holding a floating object in place, bring up the Game Menu press Save Changes, bring up the Game Menu press Quit, From Main Menu Start Forge, go to Edit Mode, change Gametype to Assault
Round - you have 3 minutes to place your items and save before the walls appear (hint: i use an egg timer)
Provided Inventory List - The items used to decorate your Court which are laid out in the back room.
1 - You may not Grab, Delete or Spawn any item on the map other than those provided behind the wall. If anything on the map has been moved or altered in any way your map will be disqualified. This includes, but is not limited to walls, signs, spawns, Bomb Plants and Spawn, the truck etc.
2 - You may not change the Properties of any of the above items on the map. With the exception of Turning On the hidden Walls and Bridges to preview your work. There is a provided Double Box and Fence Box on the floor you may use to change the properties (Turn Off, or Force On) of the wall pieces and scaffolding. You may not change the Channel on the Teleporters to activate them.
3 - You must work within the area provided by the hidden wall pieces and bottom layer of bridges. You may not Place any items outside of this area. Items may protrude from the wall by no more than the width of the Bomb. you may, however, float Swords or Hammers away from the wall with the use of Weapon Holders.
4 - You, or the Forgehub designer you commission, may create a signature out of Weapons or Equipment placed in the upper back room to mark your work. There must be at least $1 left in the budget (Budget cannot = $0)
5 - The inventory of your map will be checked against a standard list. If you Place any items not described above (Mongoose, Truck, Mancannon, Spawn, Turret), or discard any standard items, your map will be rejected.
Provided Inventory List: 22 light bars (Teleporters), 5 Weapon Holders, 5 Swords*, 5 Gravity Hammers*, 12 Power-Ups (4 Red, 4 Blue, 4 Gold), 14 Neutral Bomb Plants (only appear if the Gametype is set to Assault)
*EDIT: You may use more Hammers and Swords than the 5 of each provided.
6 - Power-Ups. You may use Power-Ups in the design (see H3P Map) but these must be embedded deep enough that they can not be activated. Some have noticed that there may be a slight lag when viewing Power-Ups up close. Please be sure to place Power-Ups above the center line of the design, and to use them sparingly (smaller circles) if possible.
7 - No Obscene/Offensive designs, signatures or descriptions.
8 - All discussion regarding the rules, submission, certification, or distribution processes will be contained to the thread at grifball.com. All forge discussion will be contained this thread. Ask your forge questions here, ask your submission/approval questions there.
9 - Additional rules, included within the instructions, will be shown in red text.
10 - It is not necessary to remove the scaffolding or other related items when submitting the map for approval. You may need to make further changes if the map is rejected so i will leave everything in place. I will delete the items as part of the approval process.
Building The Map:
You should download the map, start Forge, go to Edit Mode and change the gametype to Assault. Then have a good look around the map before proceeding with the instructions.
Download the template map here.
Download a sample map from Halo3Planet here.
The first thing you will notice is the scaffolding. This has been carefully set to the equivalent of about 2 inches away from the wall, anything you place against the back of the scaffolding will appear on the wall after the wall is turned on. You can turn the scaffolding off and force the wall on to view your work (or wait 3 minutes for the walls to turn themselves on).
wall turned off
To place objects you grab them and carefully (very slowly) place them against the scaffolding, then lock them into position.
Letters, words or symbols are formed using the light bar that appears on the Teleporters and carefully placing them so that only the light bar shows through the wall. The Teleporters have been pre-positioned so the light bars are slightly angled. 
italics anyone?
To make horizontal and vertical light bars we have provided stairs in the back room (with a sample Teleporter in place) which may be used to align the Teleporters to the correct position.
Note: the stairs have since been moved to the back room.
You may also do the same with vertical light bars.

It is best to position Power-ups by hand. Turn off the fence boxes and manually position the Power-ups.
Power-ups may be placed within other objects.
The more it sticks out of the wall the larger it will be.
At this point i should mention, never delete ANYTHING. Get into the habit of turning objects off and on to get them out of your way. Should you accidentally delete or grab an item which is not on the Provided Inventory List, please quickly quit the map and start from the last save. You should also be saving different versions as you progress.
Swords and Hammers are provided. You may place up to a total of five of these by hiding weapon holders within the wall... 
...and placing the weapons after the scaffolding is removed for the last time. 
Teleporters amd Bomb Plant Circles may be placed bottom side down so the bases show...
... or placed directly on the outside of the wall.
You will find that all items may be merged with other items.
These are the items provided for you...
...the rest is up to you.
Advanced Forging
I have placed Spawn Areas markers in strategic positions to enable you to easily align objects, and to easily hand place items without the use of the scaffolding.
Along the left side are the vertical markers. They only show up when in the Assault Game Type.
They are set up to 5 different vertical positions and can be easily adjusted to fit your needs. On the right side i have provided 2 additional Spawn Area markers for horizontal alignment and measurement.
You will also note a Spawn Area marker above the other two. This is the most useful of the markers; it is set to approximate the actual wall. You would use this in place of the scaffolding for hand placing items as you can see exactly what is viewable when the walls are in position.
I will be visiting this thread several times a day to answer any forge related questions.
cheers
nokyard